Large Taggie Blanket
Free Pattern With Tutorial


Making your own taggie blanket is not difficult and would suit all levels of sewer. You can use fabrics that you already have, just like I did or have fun buying a coordinating bunch of fabrics. Variety is what makes this project stunning.
Taggie Pattern
You can download your free pattern here.
First lets cover a few basics about taggie blankets...
What is a Taggie Blanket?
These are blankets of any size that have tags or loops of ribbon (or similar) sewn into the seams. Some blankets have them sewn into the seams around the edges - this creates loops around the edges. Others sew them into seams that are within the blanket like the one on this page.
They are generally soft and squeak free.
What is a Taggie Blanket Used for?
Most taggie blankets are used by babies as an exploratory play toy. Whether they are large or small wee hands can explore the textures of the tags/loops and also the fabric used to make the blanket. Some people attach toys to the loops as an added feature.
My daughter uses hers as a play mat, change mat, pram cover... and she always carries a range of wee toys in her nappy bag that she can attach if she wants or needs to.
How to make a Taggie Blanket
For this blanket I have used the following types of fabrics:
- 100% cotton (18)
- Minky (6)
- Wool (1)
- Corduroy (1)
The number along side each of the above fabrics lets you know how many different ones I used.
It doesn't matter what mix of fabrics you use or if you only use one type of fabric. All scenarios work.
For the taggies I have used a variety of ribbons, rick rack, elastic and cord. Again you can use what you have on hand. The key here is to ensure you cut them long enough (minimum 3" is good) so that when they are folded over and sewn into the block that they are long enough to allow you to thread a taggie toy through! Most of mine were cut 3 1/4" to 3 1/2" long.

I have added 2 ties onto the back of this taggie blanket as well as a cute fold option (a pretty fabric on the back) so that it can be attached to a pram making it very versatile - all at my daughter's request.


Download your free Taggie Blanket pattern here.
To download this pattern you will need to have the latest version of Adobe Reader on your computer. It is a free software program and can be downloaded here.
So lets get on with the tutorial so you can make your own!
Taggie Blanket Requirements:
- A selection of fabrics
- A selection of ribbons/trims - 1/2 yard of about 12 different ones
- 2 1/2 yards for backing & binding
- 46" square of batting
If you are buying your fabrics for this wee taggie blanket then I would suggest buying 20-25 fat quarters or 12" (30cm) of each fabric - this will give you plenty to play with and also extra to use to make a few taggie toys as well.
Step 1 - Cut Fabrics
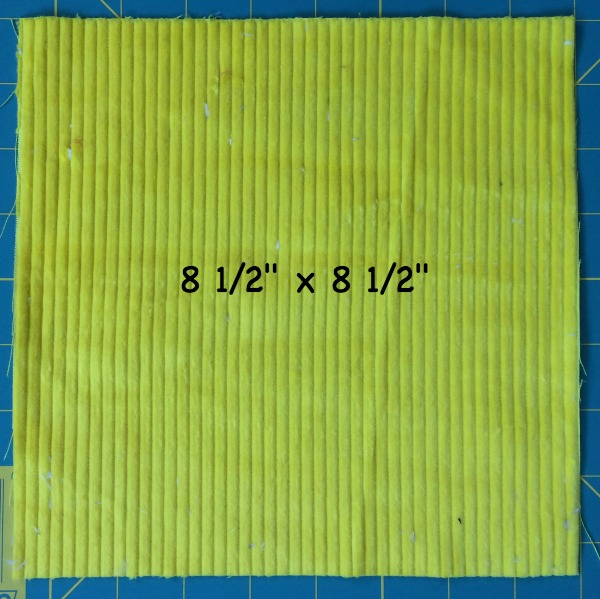
Cut 5 squares - 8 1/2" x 8 1/2"
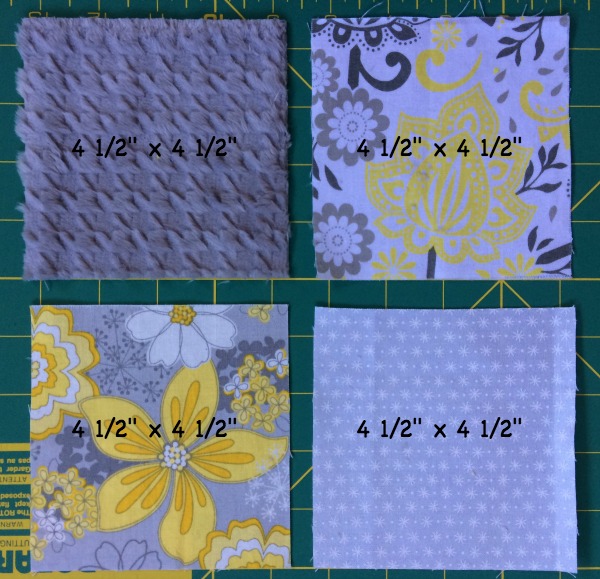
Four Patch Block
Cut 40 squares - 4 1/2" x 4 1/2"
Makes 10 blocks
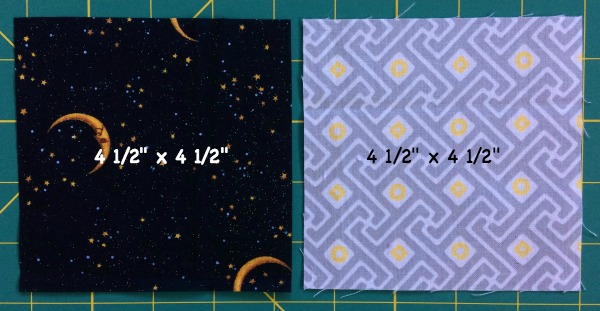
Two Patch Block
Cut 8 squares - 4 1/2" x 4 1/2"
Makes 4 blocks

Small Square Block
Cut: six - 4 1/2" x 2 1/2" strips
six - 8 1.2" x 2 1/2" strips
three - 4 1/2" x 4 1/2" squares
Makes 3 blocks
Large Square Block
Cut ten - 6 1/2" x 1 1/2" strips
ten - 8 1/2" x 1 1/2" strips
five - 6 1/2" x 6 1/2" squares
Makes 5 blocks
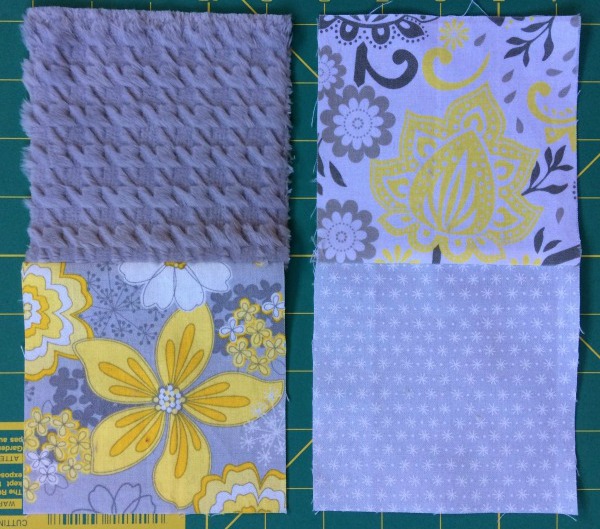
Step 2 - Block Assembly
There is nothing to assemble for the large 8 1/2" square block - it's is finished as it is.
Below I have shown how to sew each block together in photo format so I hope that makes it easier to work through...
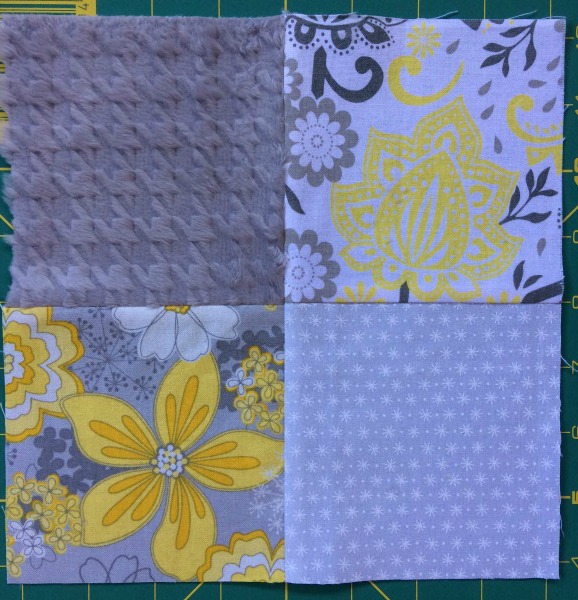
Four Patch Block
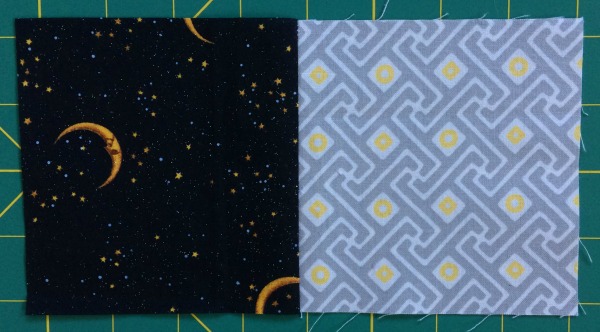
Two Patch Block
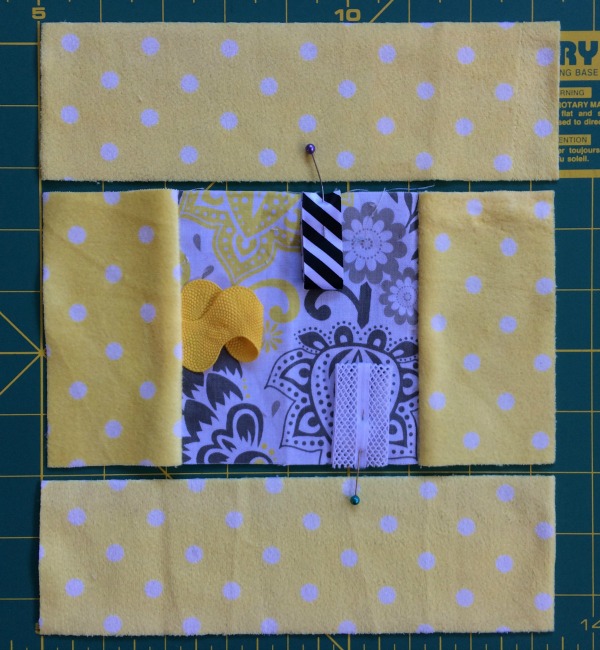
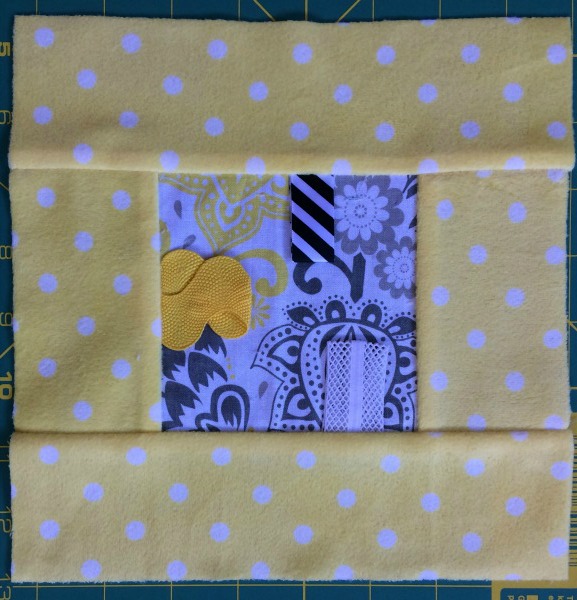
Small Square Block - remember to add your ribbons, rick rack etc to the centre blocks before sewing the block together
Large Square Block - remember to add your ribbons, rick rack etc to the centre blocks before sewing the block together
Trim all blocks to 8 1/2" x 8 1/2" square. Doing this will ensure that your blocks sew together evenly. If you find that a couple of the blocks are a little on the small side then take note of them and adjust your seam allowance when sewing your blocks together in the next step.
Step 3 - Taggie Blanket Layout
Now the fun begins! Lay out all your completed blocks on a flat surface and play with the placement until you are happy. I find taking photos a great help here as this gives me a different view of the layout.
When you are happy with your layout it is time to sew the blocks together row by row.
You're nearly there! Now it's time to sew the rows together. You are going to do this with 2 rows first and then pin & stitch each additional row.
Pin together the rows at the block seams where you can. You may need to do a bit of 'fudging' to get them all to fit nicely.
Step 4 - Complete your blanket
- Lay your backing wrong side down, add batting & lastly lay blanket top right side up and baste together
- Quilt all layers together
- Bind your blanket with binding strips
If you are planing on using this taggie blanket as a stroller cover as well then you will need to add ties onto the back at the appropriate position for that stroller. My advice is to:
- machine stitch them on well
- make them long enough that you have choices as to where you tie them on to the stroller
Taggie Toys
The toy on my blanket is super easy to sew and is made from 2 pieces of fabric 4 1/2" square. So briefly here is what you need to do:
- Cut out two squares of fabric 4 1/2" x 4 1/2"
- Pin folded ribbons etc to all sides of one square on the right side
- Pin tag strap at the corner (pin loose end in the block centre so that it stays out of your way)
- Place 2nd square on top right side down & pin
- Stitch around all sides remembering to leave a 2" gap for turning
- Turn right side out
- Stuff
- Stitch around the edge
- Add snap
My ladybug was added as an after thought to liven it up (hand stitched on). I have also added a rattle inside this toy and you do this at the time of stuffing it.

This puzzle ball is also known as the 'Amish Puzzle Ball' and is quite easy to make. You can check YouTube out for how to assemble the puzzle.
Here is the Puzzle Ball Pattern I used.
It is easy for little hands to hold and for older children to play with as well. Photos below show the three components of the ball as well as the ball half made.


My Amazon ads are my affiliate links. Thank you.
Sign up for my newsletter below!
Love Quilts?
Come be social with me - click here!


Sign up for my newsletter below!

How there's so much free information on this site.
Sometimes I recommend a product(s) that I have used & loved when making my quilts etc. If you buy something through one of these links, I receive a small commission which allows me to design & make more quilts! There is no extra charge to you, and it helps keep my information/patterns free of charge. To learn more please see my affiliate disclosure document.
Recent Articles
-
Perth Quilt Tour 2019
Nov 08, 18 04:17 PM
May 19 to May 28 2019 – Time for a getaway Join the fully escorted tour and take in the sights and tastes of the Margaret River Valley, visit the Perth Craft & Quilt Show and plenty of other exciting…
-
Pattern available for the Conical Felt Tree!
Oct 13, 18 11:21 PM
The Conical Felt Tree pattern is now available. This is a fabulous Christmas tree to make for young children. They will decorate this tree over and over again! Suppliers of the thick felt & Velcro fab…
-
Conical Felt Christmas Tree
Oct 11, 18 09:00 PM
Cassie is having fun decorating her Christmas tree! The pattern will be available at the end of October 2018.