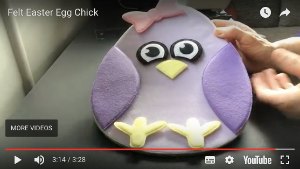
Felt Easter Chicken
The perfect non chocolate gift


This cute felt Easter chicken is created by making a range of felt accessories to place on the egg using velcro tape sewn onto the back of each piece.
- Wings
- Feet
- Beak
- Eyes
- Bow

Pattern Now Available!!

THIS IS A PDF DIGITAL DOWNLOADABLE E-PATTERN.
No physical pattern will be shipped or mailed.
Supplies
To make these chicken accessories you will need:
- Felt
- Double sided fusible webbing
- Firm interfacing
- Velcro tape -hook side
- Freezer paper
Helpful Tips
If you are new to working with felt then here are a couple of tips that will make this process easier
- Machine sewing felt is quick & easy but does require the correct needle size - 90/14 works great sewing polyester felt
- Increase your stitch length slightly
- Use sharp scissors that cut right to the tip to cut your felt
- Sewing velcro on can be tricky - use non adhesive velcro and if your sewing machine is not behaving then change your needle to a 'Jeans' needle
For a more detailed list of tips to help you sew felt visit here.
To see how to make the felt Easter chicken base egg shape that all the pieces go on then visit Felt Easter Eggs.
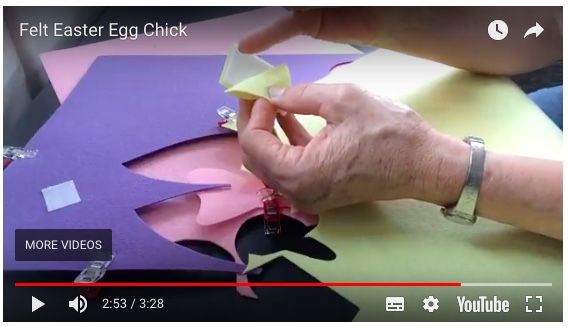
Felt Easter Chicken Video Tutorial
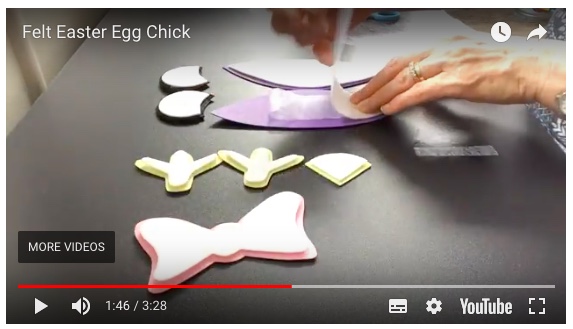
Wings, Beak, Feet, Eyes & Bow
Each of the chicken pieces is made using the same method and I have outlined it below:
Step 1:
Trace pattern pieces onto freezer paper
Rough cut out
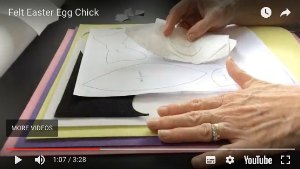
Cutting out felt pieces by pinning the pattern onto the felt gives you misshapen pieces, due to the felts thickness. Using freezer paper overcomes this. You can also use scotch tape to hold your pattern piece onto the felt while cutting it out.
Step 2:
Iron freezer pattern piece onto felt
Cut out
Iron freezer pattern piece onto firm interfacing and cut out 2mm smaller than the pattern
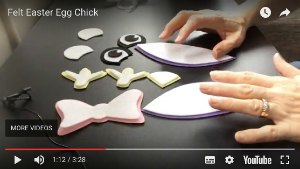
Use a warm iron to do this. Freezer paper can be reused over and over again until it will no longer adhere when ironed.
When cutting felt it is best to use sharp scissors that can cut right to the tip
Using firm interfacing gives these pieces extra strength & durability
The firm interfacing is cut smaller (approximately 2-3mm) than the felt so that it doesn't show around the edges of the completed felt shape
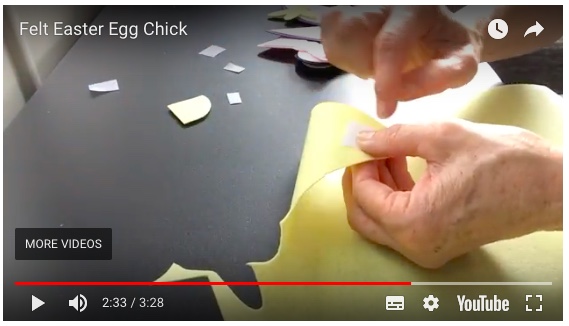
Step 3:
Using fusible webbing secure felt to firm interfacing with a hot iron, using a pressing cloth
A hot iron is needed to melt the webbing due to the thickness of both the felt & interfacing.
Use what ever type of fusible webbing you have handy eg Steam a Seam
Step 4:
Add velcro to backing felt
Sewing through all these layers can prove problematic - if this happens then you will need to change your needle to either
To check your velcro position on the backing piece of felt hold it up to a window
When stitching your velcro on use a matching thread to the velcro colour
Step 5:
Use fusible webbing to secure the front felt piece with firm interfacing onto the backing felt
Iron to secure
Use a hot iron for this and a pressing sheet
Step 6:
Stitch all layers together around the edge
Trim away excess felt backing
Use a slightly longer stitch than normal here and stitch slowly around the edges about 2-3mm in from the edge
Remember to use sharp scissors that are able to cut right to their tip. This will give you nice clean cuts & corners
Step 7:
If required stitch embellishment lines
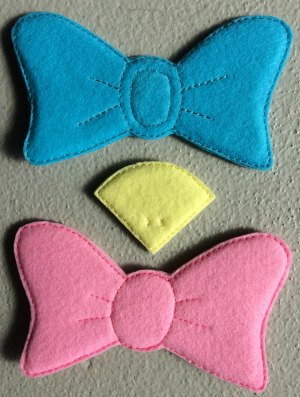
Extra sewing lines are needed on the bow to create the creases and central oval.
Also 2 wee stitches are needed to create the nostrils on the beak.
Use a slightly longer stitch than normal for these stitches.
I hope you have enjoyed my felt Easter chicken creation. Please leave me a comment below and/or post a photo of your Easter chicken.
Please share this page with your friends so they can make one too.
- Quilts ›
- Easter Eggs ›
- Chicken
Sign up for my newsletter below!
Love Quilts?
Come be social with me - click here!


Sign up for my newsletter below!

How there's so much free information on this site.
Sometimes I recommend a product(s) that I have used & loved when making my quilts etc. If you buy something through one of these links, I receive a small commission which allows me to design & make more quilts! There is no extra charge to you, and it helps keep my information/patterns free of charge. To learn more please see my affiliate disclosure document.
Recent Articles
-
Perth Quilt Tour 2019
Nov 08, 18 04:17 PM
May 19 to May 28 2019 – Time for a getaway Join the fully escorted tour and take in the sights and tastes of the Margaret River Valley, visit the Perth Craft & Quilt Show and plenty of other exciting…
-
Pattern available for the Conical Felt Tree!
Oct 13, 18 11:21 PM
The Conical Felt Tree pattern is now available. This is a fabulous Christmas tree to make for young children. They will decorate this tree over and over again! Suppliers of the thick felt & Velcro fab…
-
Conical Felt Christmas Tree
Oct 11, 18 09:00 PM
Cassie is having fun decorating her Christmas tree! The pattern will be available at the end of October 2018.