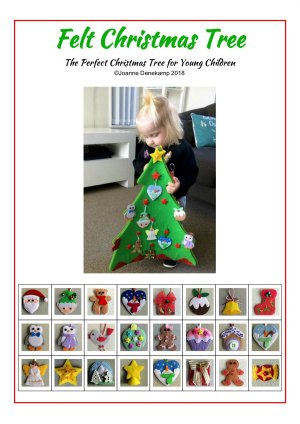
Felt Christmas Tree


This fabulous 3D felt Christmas Tree will be loved by all ages especially the very young. It's made using 3 layers of different fabrics/materials that make it sturdy and long lasting!

Monday 1st January 2024 update.
Six years on and this wee tree is still brought out to be decorated and not only at Christmas time but any time throughout the year. It almost looks new and I'm very happy that it has stood the test of time.
Here's a short video showing each side of the tree and how the felt Christmas tree is assembled as well as being able to attach to a fridge.
THIS IS A PDF DIGITAL DOWNLOADABLE E-PATTERN.
No physical pattern will be shipped or mailed.

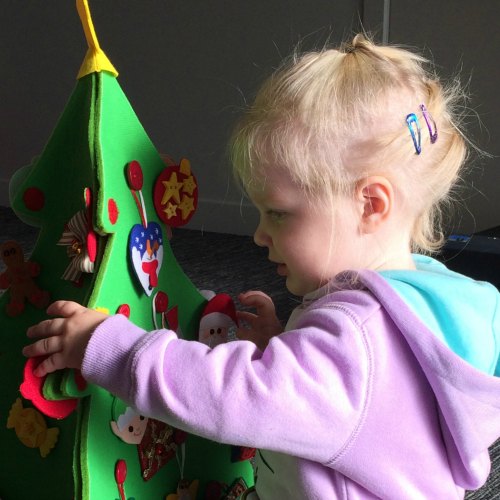
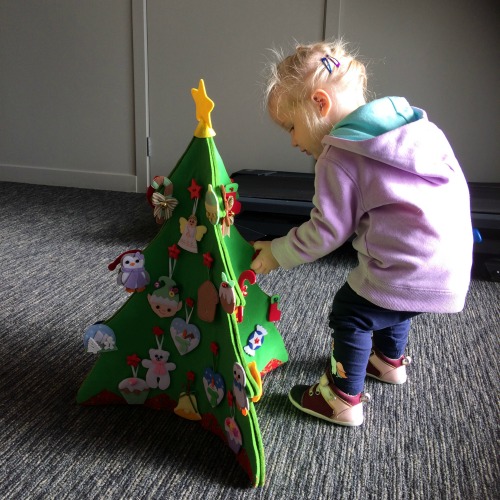
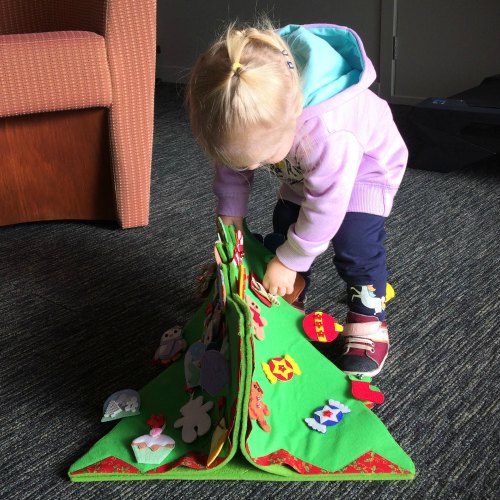
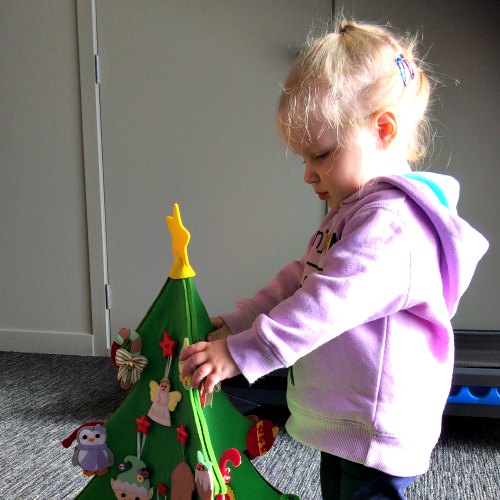
My daughter & I have designed this tree so that it can be decorated by a toddler through to a teenager. Each of the 3 sides has a different method of attaching the decorations:
- Side 1: Velcro fabric - decorations can be placed anywhere on this side - toddler friendly
- Side 2: Velcro dots - decorations are placed onto the velcro dots - this requires more eye hand coordination - 2 -4 year olds
- Side 3: Buttons - decorations have loops attached and these are looped over the buttons - this requires fine hand coordination - 4 years +


The 3 tree sides can be used independently of each other. Using magnetic claps to join the three sides together has the benefit that each tree side can be placed on a fridge or hung on a wall. I love the versatility that this tree offers!!

Felt Christmas Tree Supplies
Supplies:
- 5mm thick felt
- Velcro fabric
- Christmas fabric
- Freezer paper
- fusible woven interfacing
- fusible double sided webbing
- Velcro tape - loop (soft) side for the tree
- Buttons
- Magnetic clasps
The Christmas fabric is missing in the photo below because I couldn't decide which one to use at this stage...

Part 1
Tree Front Construction
First you need to prep the velcro and Christmas fabric.

Iron the velcro fabric on the wrong side using a warm iron. There will be slight shrinkage from this.
All future pressing directly onto the Velcro fabric right side will be done using a hot dry iron AND a pressing cloth.

Next the Christmas fabric needs to be folded in half lengthwise with double sided fusible webbing between & ironed.

Iron fusible interfacing onto the wrong side of the velcro fabric.

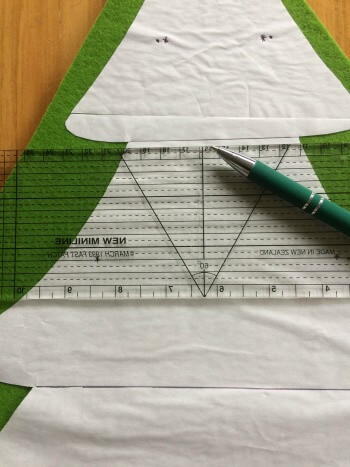
Trace the tree pattern onto freezer paper. Using a pencil or a hole punch - mark holes for magnetic dome placements through the freezer paper.
Using a warm Iron, iron freezer paper pattern onto wrong side of velcro fabric then cut out.
Remove freezer paper carefully. This freezer paper tree is going to be used multiple times so take care to not tear it or you will need to mend it!

Cut out Christmas fabric from pattern piece. Folded edge is the base of the pattern.
Part 2
Attaching the Tree Fronts Fixings
I like to attach all the fixings eg buttons and/or velcro dots now so that all the stitching is hidden once the felt back is attached.
First decide how many you want to add and where you want to put them. The 2 things you need to remember when doing this is are:
- the decorations are 2" - 2½" long
- you will be stitching the front tree to the backing felt so will need room for your presser foot - so velcro dots can go close to the edge but buttons can't

Cut circles out of you velcro tape - loop (soft) side. I use non-adhesive velcro tape as the adhesive ones gum up your sewing machine needle.
Sew these onto the prepared tree front using a 90/14 sized needle.

Mark your button positions and sew them on. If you are using flat buttons then remember to stitch them on with a bit of give so that the decoration ribbon can be easily looped over them. Shank buttons would be best here if you can find ones that you like.
Part 3
Adding Magnetic Clasps

Place the freezer pattern onto the thick felt and iron. Rough cut out the tree.
Next I mark the magnetic clasps positions. This can take a bit of time. I went back & forth with my hubby and daughter Katherine as I hadn't used these clasps before so was unsure how many I would need. Time will tell at the end if I got it right or not...

Using the washer - place this on felt and with a craft knife cut 2 slits through all layers either side of the central circle.

Remove the washer and push the prongs through the 2 cut slits. Turn everything over and then place the washer over the exposed prongs on the wrong side. Using a tool - I used a screw driver - push prongs outwards so they lie flat. Repeat this process for the remainder clasps.
Part 4
Sewing Front & Back Together

Layer everything together using a double layer of webbing between the felt & tree front. Take care that you position the tree front equidistant from all magnetic clasps.
Now place the Christmas fabric section at the bottom underneath the trees edge. Hot iron press using a pressing cloth to protect the velcro fabric. Trim excess webbing away as you go.

Using a 100/16 sewing machine needle and a longer stitch than usual stitch around the outer edge of the tree and the zigzag edge at the bottom. You will need to take care sewing around the magnetic clasps due to their thickness.
One last task to go - trim excess thick felt. Take care here because if you cut too close you could end up cutting through your stitching at the back of the felt (I found this out the hard way).
Only 3 sides are needed to make this 3D felt Christmas tree but as I had some spare fabric and a few pattern changes to make, I decided to add a 4th side variation (shown in the videos above) just for fun!
All sides can be joined in any order or combination or alternatively used individually - you choose.
Felt Christmas Tree Sides
Side One
Toddler friendly

Side Two
2-4 years old

Side Three
4+ years old

Side Four
Combo

Felt Decorations
The following felt Christmas tree decorations have been designed to fit on the tree.
More information about these decorations can be found here.


My Amazon ads are my affiliate links. Thank you.
Sign up for my newsletter below!
Love Quilts?
Come be social with me - click here!


Sign up for my newsletter below!

How there's so much free information on this site.
Sometimes I recommend a product(s) that I have used & loved when making my quilts etc. If you buy something through one of these links, I receive a small commission which allows me to design & make more quilts! There is no extra charge to you, and it helps keep my information/patterns free of charge. To learn more please see my affiliate disclosure document.
Recent Articles
-
Perth Quilt Tour 2019
Nov 08, 18 04:17 PM
May 19 to May 28 2019 – Time for a getaway Join the fully escorted tour and take in the sights and tastes of the Margaret River Valley, visit the Perth Craft & Quilt Show and plenty of other exciting…
-
Pattern available for the Conical Felt Tree!
Oct 13, 18 11:21 PM
The Conical Felt Tree pattern is now available. This is a fabulous Christmas tree to make for young children. They will decorate this tree over and over again! Suppliers of the thick felt & Velcro fab…
-
Conical Felt Christmas Tree
Oct 11, 18 09:00 PM
Cassie is having fun decorating her Christmas tree! The pattern will be available at the end of October 2018.