Prairie Points
Prairie Points are a border of folded triangles that edge your quilt. Some quilters don’t call it a true form of binding but it is a variation of quilt binding.
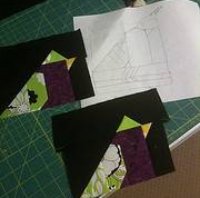
The edging is made of folded fabric triangles that have been overlapped along the edge of the quilt. You can have these folded triangles facing either inwards or outwards on your quilt. They can also be added within your quilt around blocks or as a feature within a block as can be seen in the photo below. This shows a single prairie point on the birds head (shown in the paper pattern as well). Photo courtesy of Heidi Elliott
|
Folded triangles are added once you have finished quilting your three layers together. Ensure you don’t quilt the last 1” around the quilt. Fold and pin the backing out of the way as it will be finished last. |
 |
Prairie Point Instructions
1. Choose the size you want your point to extend from the edge of your quilt. (It is good to remember that a point that extends beyond 3” will tend to flop over). Times this by 2 and add ½ an inch. For example, if you want your points to extend two inches beyond the edge of the quilt, multiply 2" x 2" + 1/2" = 4 /12". Cut the square for a two inch point 4 1/2" x 4 1/2".
2. Cut the required number of squares.
3. Fold each square in half diagonally. Fold in half diagonally a second time. Lightly press the triangles so they keep their shape.
4. The triangles either lay on top of each other (overlapping) or fit down inside each other (nesting). Either way is fine. With right sides facing, position the raw edge of each prairie point along the quilts raw edge. Working from the center to the corner , adjust overlap to position folded triangles evenly. Pin in place and stitch. Trim seams and clip corners on the diagonal.
5. At the corners the folded triangles should be adjacent to each other and not overlapped.
6. Turn the seam allowance toward the back of the quilt. The points will turn out along the edge.
7. Release the pinned backing and fold under the raw edges to match the base of the folded triangles, covering the seam line. Hand stitch in place. If necessary, complete quilting out to the edge.
Tips
* You can use the pillowcase method to finish the quilt.
* For added interest, combine folded triangles of different sizes in one border.
* If the quilt has a traditional binding, the points will sit on the top of the quilt instead of facing outward, cut the binding 1/4" wider than normal to account for the added thickness of the folded squares, and bind the quilt normally, encasing the points raw edges.
* The following video shows them being made using a special ruler.
Sign up for my newsletter below!
Love Quilts?
Come be social with me - click here!


Sign up for my newsletter below!

How there's so much free information on this site.
Sometimes I recommend a product(s) that I have used & loved when making my quilts etc. If you buy something through one of these links, I receive a small commission which allows me to design & make more quilts! There is no extra charge to you, and it helps keep my information/patterns free of charge. To learn more please see my affiliate disclosure document.
Recent Articles
-
Perth Quilt Tour 2019
Nov 08, 18 04:17 PM
May 19 to May 28 2019 – Time for a getaway Join the fully escorted tour and take in the sights and tastes of the Margaret River Valley, visit the Perth Craft & Quilt Show and plenty of other exciting…
-
Pattern available for the Conical Felt Tree!
Oct 13, 18 11:21 PM
The Conical Felt Tree pattern is now available. This is a fabulous Christmas tree to make for young children. They will decorate this tree over and over again! Suppliers of the thick felt & Velcro fab…
-
Conical Felt Christmas Tree
Oct 11, 18 09:00 PM
Cassie is having fun decorating her Christmas tree! The pattern will be available at the end of October 2018.