Jennifers Music Quilt
Made in 2010 - 2011
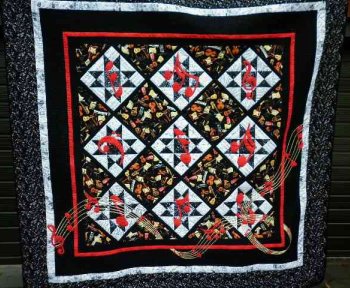
This music quilt I designed for my daughter who is very musical. The layout idea came from browsing the net. When I took a quilting class in 2010 teaching how to use Marti Michell's templates, I put together the blocks for this quilt top. It also has mitered corners that the tutor taught. The quilt top then sat in my cupboard for a year.
This music quilt is very large. My daughter has a queen bed and she wanted it to have a long drape on 3 sides! It would probably fit a king sized bed as well. The fabrics are all music themed and I had been collecting these over several years.
The alternating fabric is a 12" square piece of music fabric. Sorry for the poor quality of the photo (in time I will get another one - this daughter has 3 cats so it may still look out of focus!).
Below is the graphic of the quilt top image that caught my attention when browsing the web. It came from an Australian website called Patterns Only.

The star block I made for this quilt was Variable or Evening Star. This star block is very similar to Ohio Star if turned on point. I made these blocks using Marti Michell's Template B set. Marti Michell's Set A and B both have templates to make this block in a range of sizes (from 4 1/2" to 12"). Each block is made 12" x 12". I love Marti's template system because you don't need to pin your pieces together. The templates include your 1/4" seam allowance! Also the cutting is based on strips of fabric being cut first to the correct width. The accuracy you obtain when sewing your block together is fantastic!
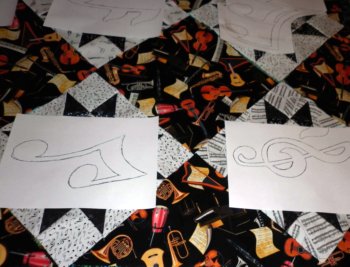
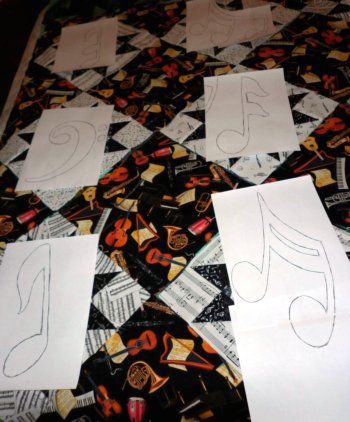
The photos above show the musical notion patterns I used. I have appliqued a different red music symbol over each star block.
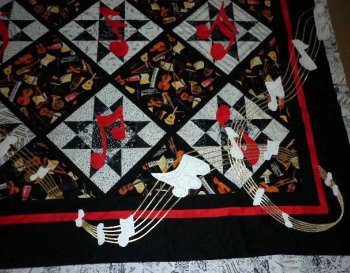
Then to add a little interest at the bottom of the quilt I used Clover gold bias tape to create the music lines which I again appliqued on. The notes I used were exactly the same ones as used on each block but they were significantly reduced in size as can be seen in the two photos below. These were appliqued onto the quilt as well. The first photo shows the left side and the next photo shows the right side of the quilt.

Sign up for my newsletter below!
Love Quilts?
Come be social with me - click here!


Sign up for my newsletter below!

How there's so much free information on this site.
Sometimes I recommend a product(s) that I have used & loved when making my quilts etc. If you buy something through one of these links, I receive a small commission which allows me to design & make more quilts! There is no extra charge to you, and it helps keep my information/patterns free of charge. To learn more please see my affiliate disclosure document.
Recent Articles
-
Perth Quilt Tour 2019
Nov 08, 18 04:17 PM
May 19 to May 28 2019 – Time for a getaway Join the fully escorted tour and take in the sights and tastes of the Margaret River Valley, visit the Perth Craft & Quilt Show and plenty of other exciting…
-
Pattern available for the Conical Felt Tree!
Oct 13, 18 11:21 PM
The Conical Felt Tree pattern is now available. This is a fabulous Christmas tree to make for young children. They will decorate this tree over and over again! Suppliers of the thick felt & Velcro fab…
-
Conical Felt Christmas Tree
Oct 11, 18 09:00 PM
Cassie is having fun decorating her Christmas tree! The pattern will be available at the end of October 2018.