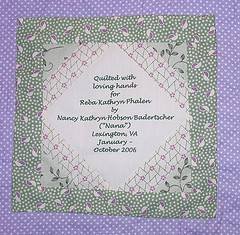
Quilt Label Instructions
Quilt label instructions are easy to follow. Labels are created to primarily display the artists signature. As with all works of art a signature is very important. The added benefit for quilters is that a quilt label can also contain extra information such as:
* Who the quilt has been made for
* How to care for the quilt
* What type of batting has been used
* Year made
Requirements
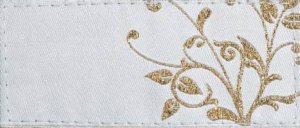
* Fabric - usually in a lighter shade so that your writing shows. If you have prewashed your quilt fabric then it is best to prewash your label fabric as well.
* Freezer paper - it should have a wax and a dull side
* Rotary Cutter, mat and ruler
* Scissors
* Fabric marking pen, usually black
Instructions
Step 1: Cut label fabric to size (4 1/2" x 5").
Step 2: Iron flat.
Step 3: Cut a piece of freezer paper 1/2" bigger on all sides than the label.
Step 4: Using a marking pen draw lines on the dull side of the freezer paper to use as a writing guide. The freezer paper also helps to stabilize the label fabric when you are writing on it.
Step 5: Turn lined freezer paper wax side up, place fabric label right side up and flip both over together. Press.
Step 6: Turn over - you should be able to see the drawn lines through the fabric.
Step 7: Using a fabric pen write on the label.
Step 8: Peel off the wax paper.
Step 9: Turn under raw edges of label and press.
Step 10: Hand stitch in place on the lower right hand corner.
Sign up for my newsletter below!
Love Quilts?
Come be social with me - click here!


Sign up for my newsletter below!

How there's so much free information on this site.
Sometimes I recommend a product(s) that I have used & loved when making my quilts etc. If you buy something through one of these links, I receive a small commission which allows me to design & make more quilts! There is no extra charge to you, and it helps keep my information/patterns free of charge. To learn more please see my affiliate disclosure document.
Recent Articles
-
Perth Quilt Tour 2019
Nov 08, 18 04:17 PM
May 19 to May 28 2019 – Time for a getaway Join the fully escorted tour and take in the sights and tastes of the Margaret River Valley, visit the Perth Craft & Quilt Show and plenty of other exciting…
-
Pattern available for the Conical Felt Tree!
Oct 13, 18 11:21 PM
The Conical Felt Tree pattern is now available. This is a fabulous Christmas tree to make for young children. They will decorate this tree over and over again! Suppliers of the thick felt & Velcro fab…
-
Conical Felt Christmas Tree
Oct 11, 18 09:00 PM
Cassie is having fun decorating her Christmas tree! The pattern will be available at the end of October 2018.