Hexagon Quilt Tutorial
Made in 2012
Hexagon quilts have always looked like they involved a lot of work, time and hand stitching. Most of my friends who have made them rave over how therapeutic they are to make - not something I thought possible - probably because hand stitching is not the love of my life.
Anyway I finally decided to give them a try and as my hexagon quilt progressed my husband reminded me how many times I said I was really enjoying the process and how therapeutic I was finding it!!
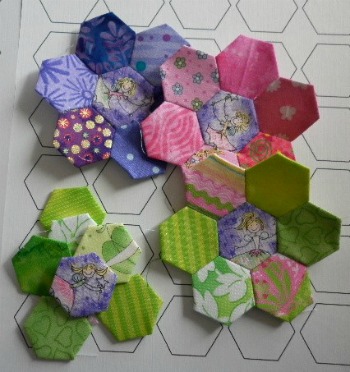
I made my hexagon quilt out of fabric from my scrap containers. Initially I thought I'd make a wee dolls quilt but my daughter came over and said they would make a great pillow to match my grand daughters quilt! Time will tell what they eventually end up as. I'll have fun playing with them as I progress.
Before we begin here are a few tips:
* You can buy ready made templates. You can make your own templates either from paper or thin card. I made mine from thin card.
* You sew through the fabric not the templates
* It is not always necessary to remove the basting thread so choose your color well.
* Some people punch a hole in the middle of their templates to make removal easier. This can cause the templates to be less stable.
* Hexagon template removal can be done as you go (then you can reuse the templates!) after all 6 hexagons bordering it have been sewn to it.
Below is the method I used to make my wee hexagons. This technique is known as English Paper Piecing.
|
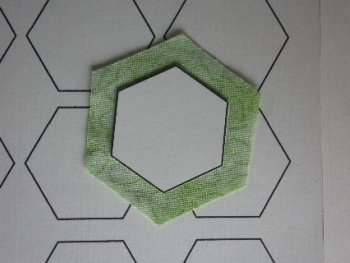
Step 1: Hexagon size is measured by the length of one of the sides of the hexagon. Mine was 3/4". Once decided go to Moxyideas to download a free template hexagon sheet (3/4", 7/8", 1" and 1 1/2"). Mine are showing behind each photo. Step 2: Cut out hexagon templates and hexagon fabric shapes at least 1/4" larger on all sides than your template. |
|
Step 3: Place card template centrally on fabric. Pin in place if you want to. |
 |
|
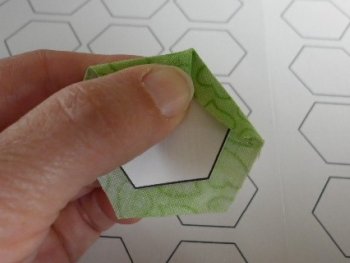
Step 4: Fold one side of fabric over the cardboard template, finger press. Next fold over second side of fabric & finger press. |
 |
|
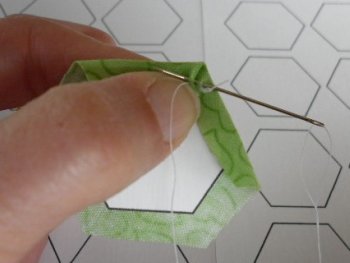
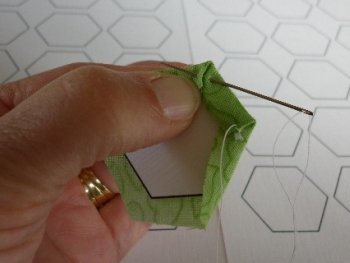
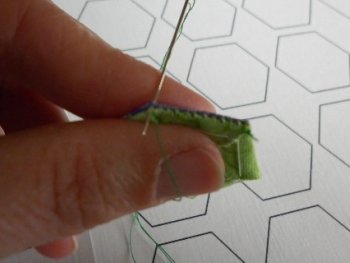
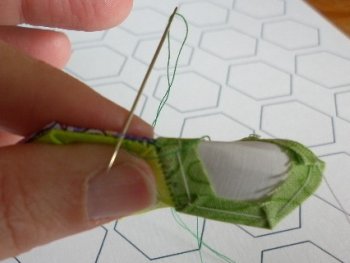
Step 5: Using a small stitch secure the corner with a stitch. Take a second stitch in the same place. As for needle size I used the largest one that my local quilt shop advised but I can't remember what size that was. |
 |
|
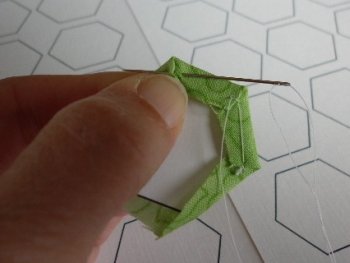
Step 6: Rotate carefully and fold over the next side of fabric. Secure this second corner with 2 small stitches. I found I needed to keep the thread quite tight to secure each corner adequately. |
  |
|
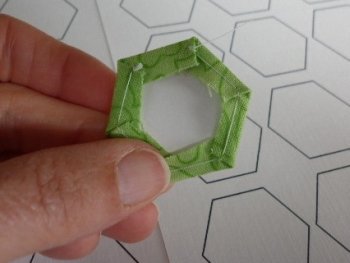
Step 7: Repeat step 5 & 6 till all sides of the fabric have been folded over the template. Your finished template should look like this. |
 |
Construction - sewing the prepared fabric covered templates together
|
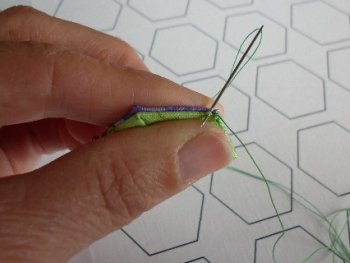
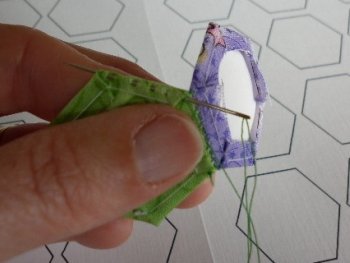
Step 8: With right sides together position 2 templates together and begin sewing at one end. I placed a knot at the end of my thread before sewing. |
 |
|
Step 9: Using small, even stitches sew along the edges of the two templates making sure you don't sew through the template as well. |
 |
|
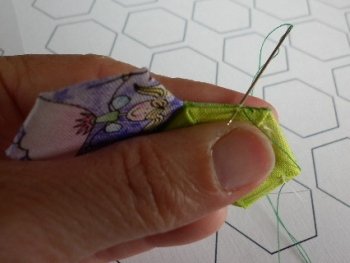
Step 10: At times you will find that your needle & thread is in the wrong position to begin sewing on your next template. I sew the thread along the wrong side as can be seen below. |
 |
|
Step 11: Position another template and sew in place. |
 |
|
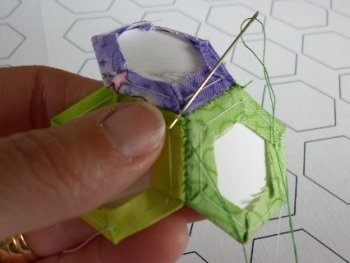
Step 12: Open out the three templates and take a couple of small stitches in the Y corner to secure the next seam. |
 |
|
Step 13: To sew the next seam you will need to gently fold one of the templates so that the 2 templates can rest against each other. See photo below. |
 |
|
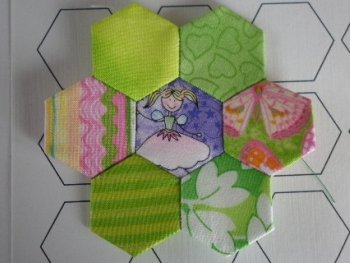
Step 14: Carry on adding templates till the hexagon quilt flower is complete, knot and cut the thread. |
 |
|
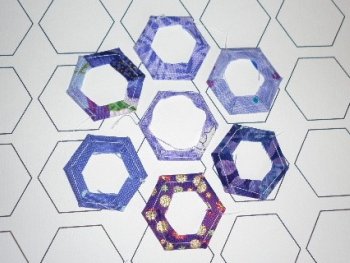
Step 15: As I continued sewing my flowers I became aware that some of my fabrics had been cut too small (central hexagon in photo below)and this caused a few problems - threads separating at the corners when sewing and being more difficult to handle. The rest of my fabrics I ensured I cut them big enough. |
 |
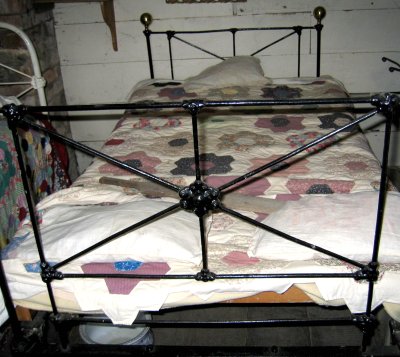
I've decided to turn my hexagons into a wee bed cushion for my grand daughter. I had some difficulty with binding the corners as they weren't at the usual 90 degrees. Then a few days after I had finished the cushion I find the video below. It is so good I decided to add it below.
To see a good range of these quilts use Google images. You'll love what you see!
History
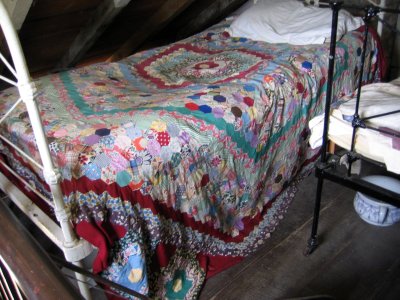
These hexagon quilts have been made by many quilters over several centuries. They can often be seen displayed in historical cottages around the world. The 2 hexagon quilts below are displayed with permission from The Howick Historical Village in Auckland, New Zealand.
Sign up for my newsletter below!
Love Quilts?
Come be social with me - click here!


Sign up for my newsletter below!

How there's so much free information on this site.
Sometimes I recommend a product(s) that I have used & loved when making my quilts etc. If you buy something through one of these links, I receive a small commission which allows me to design & make more quilts! There is no extra charge to you, and it helps keep my information/patterns free of charge. To learn more please see my affiliate disclosure document.
Recent Articles
-
Perth Quilt Tour 2019
Nov 08, 18 04:17 PM
May 19 to May 28 2019 – Time for a getaway Join the fully escorted tour and take in the sights and tastes of the Margaret River Valley, visit the Perth Craft & Quilt Show and plenty of other exciting…
-
Pattern available for the Conical Felt Tree!
Oct 13, 18 11:21 PM
The Conical Felt Tree pattern is now available. This is a fabulous Christmas tree to make for young children. They will decorate this tree over and over again! Suppliers of the thick felt & Velcro fab…
-
Conical Felt Christmas Tree
Oct 11, 18 09:00 PM
Cassie is having fun decorating her Christmas tree! The pattern will be available at the end of October 2018.