Emmys Half Square Triangle Quilt
Made in 2011

Emmy's half square triangle quilt was a quilt I made from my quilting stash and scraps. I decided to make my life easy and create this quilt using Marti Michell's triangle from her template A set. I am so pleased with how it turned out. Emmy was so enthusiastic when I gave it to her that she lay on it immediately!
This quilt is going on her bunk bed so it sits flat on the top of the mattress with no tuckin. For the reverse of the quilt I used a fairy panel and made the border from fabrics strips I didn't use on the front. Emmy, who was 5 when I gave this to her uses the fairy side as the front of the quilt! I knew she would! But as she gets older and grows out of fairies then she can use the pieced triangle side as the front. I hope she doesn't grow out of pink!
Below is a brief tutorial showing how I made this half square triangle quilt.
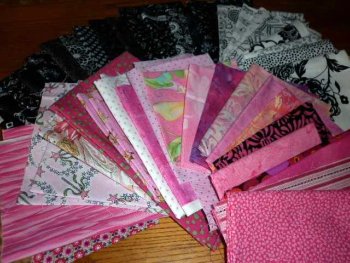
Here is the selection of fabrics I choose from my stash.
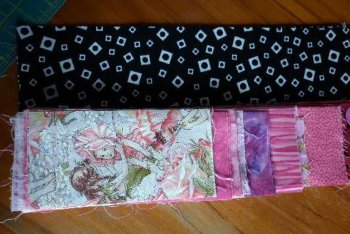
I cut strips 3 1/2" wide.
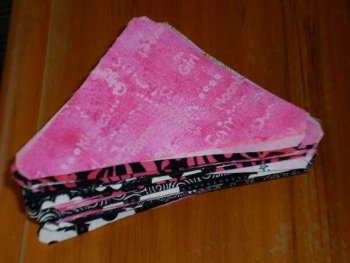
Using Marti Michell's triangle template from Set A I Cut out a lot of triangles. I love Marti Michell's templates because they remove the surplice corner fabric and this makes lining up the triangles so easy and accurate. No pinning necessary!

Here's all my triangles. I layed out several similar length strips and cut multiple triangles at a time. The most strips I did this with was 6.
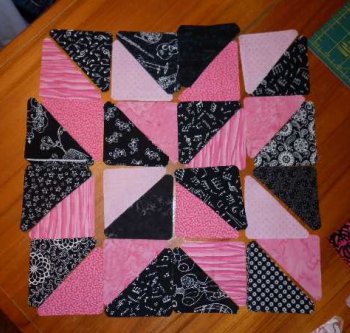
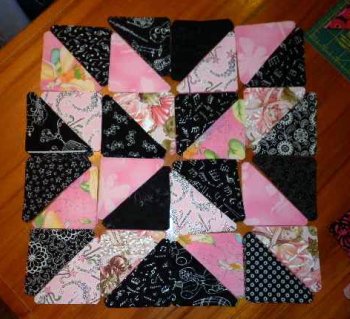
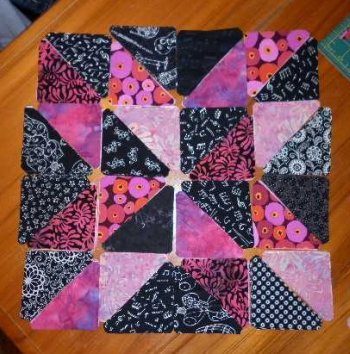
Now for the fun part! I trialed fabrics until I got a set that I liked together. The following are 3 of the blocks layed out ready for sewing. I made 7 blocks in total.
To assemble each block you first join triangles to make a square.
Next you sew the squares together in rows.
Lastly you sew the rows together.
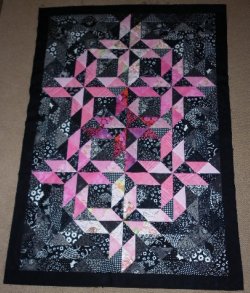
Once the 7 blocks were layed out in a desirable format I then made up several triangular blocks from the black leftover triangles.
I love this stage, when you can finally view the quilt top taking shape.
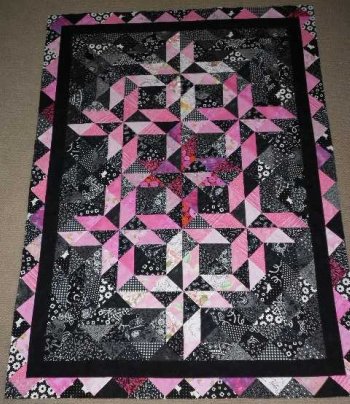
For the border I decided to piece together some of the surplus triangles I had. Once in place it didn't look good so I added a black border first then the pieced triangle border. I love the way the corners worked out. A very welcome surprise!
Enjoy!
Sign up for my newsletter below!
Like the page? Let me know! (click the button).
Love Quilts?
Come be social with me - click here!


Sign up for my newsletter below!

How there's so much free information on this site.
Sometimes I recommend a product(s) that I have used & loved when making my quilts etc. If you buy something through one of these links, I receive a small commission which allows me to design & make more quilts! There is no extra charge to you, and it helps keep my information/patterns free of charge. To learn more please see my affiliate disclosure document.
Recent Articles
-
Perth Quilt Tour 2019
Nov 08, 18 04:17 PM
May 19 to May 28 2019 – Time for a getaway Join the fully escorted tour and take in the sights and tastes of the Margaret River Valley, visit the Perth Craft & Quilt Show and plenty of other exciting…
-
Pattern available for the Conical Felt Tree!
Oct 13, 18 11:21 PM
The Conical Felt Tree pattern is now available. This is a fabulous Christmas tree to make for young children. They will decorate this tree over and over again! Suppliers of the thick felt & Velcro fab…
-
Conical Felt Christmas Tree
Oct 11, 18 09:00 PM
Cassie is having fun decorating her Christmas tree! The pattern will be available at the end of October 2018.
New! Comments
Have your say about what you just read! Leave me a comment in the box below.