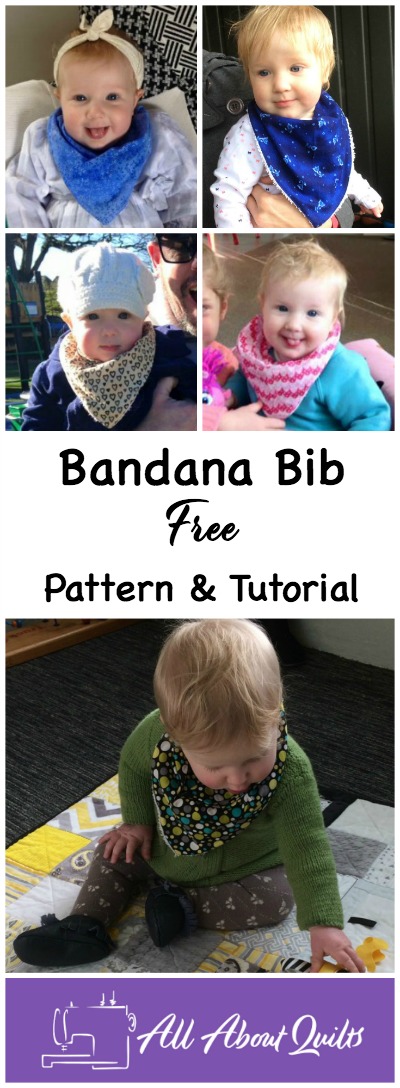
Bandana Baby Bibs
Free Pattern & Tutorial
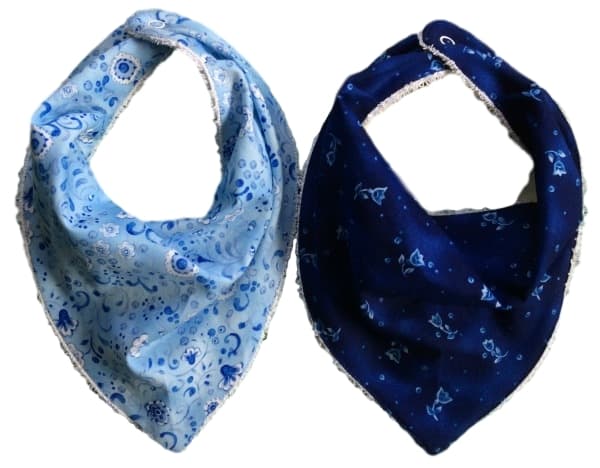
With the arrival of grandchild number three it was time to make some more baby bibs. Searching the web my daughter showed me a bandana bib she loved. We made our own pattern using the EQ7 software and are putting it here for you to use, for free.
You'll love making these very simple but highly absorbent bibs.
The following tutorial shows how to make your own bandana baby bib. It's super easy.
So lets get started!
Bandana Baby Bib tutorial


Step 1
Print out both pattern pieces from above. Print at 100%. Set scaling to 'none' & don't select any options like 'shrink to fit'. Print on A4 or US letter paper, they both will work.

Step2
Cut out fabric on the fold.

Step 3
With right side together pin one back piece to one front piece.
Mark your turning gap. You will see that I have marked a 3" gap with my pins being placed perpendicular to the edge of the bib. This is to remind me not to sew over this gap as I need this to turn the bib to the right side.


Step 4
You will have a bit of surplus fabric (left photo above) on the inner neck edge and this will be used to create a pleat.
Bring fabric together and fold it downwards toward the bottom of the bib. Pin pleat in place - you can see these in the photo above on the right, in the direction that I have placed the pleat.
The baby bib still works if the pleat lies in the other direction but I found from experience that the top fabric doesn't drape quite as well.

Step 5
Stitch around edge (1/4" seam allowance) remembering to leave an opening large enough to turn bib out to the right side. You will need to do a slight bit of fabric stretching in places but this is what needs to be done so don't worry as your baby bib will be beautiful when finished.
Clip all the curved edges and also cut across the bib point - this reduces fabric bulk at the point so your bib will sit better when turned to the right side.

Step 6
Yay - it's now time to turn your bib out to the right side. If you have a turning tool (knitting needle, chopstick or similar - fingers do work as well!) turn your bib out to the right side.


Step 7
This is the last seam and only your second seam!
I like to pin around the edge before stitching, helping to keep the extra front fabric out of the way & to keep the pleats sitting nicely.
With a slightly longer stitch than usual (I use a 3) stitch close to the edge closing the turning gap as well.

Last Step
I love using snaps on bibs. They are super easy to apply, just follow the instructions on the back of the packet. They do require a wee tool shaped like a T (shown below) to use so remember to ask the sales lady/man for that as well if your pack doesn't come with one.

Using the pattern above I have made more than 20 bibs in all sorts of left over fabrics. They are super quick to make and my daughter loves them. She tells me they are the best bibs she has ever used as they last longer than most before becoming too damp. I think this is because the top layer has more fabric than the backing layer & this allows the air to circulate through the top fabric causing a drying effect.
This pattern also has a wee pleat either side on the neck edge and does not require super accuracy but this pleat allows for more fabric and a nice fold effect to happen. Anyway we both love them!
For my backing I used towelling but I have read that you can use a range of other absorbent fabric. For the front of the bibs I used cotton fabrics from my stash.
There are only 2 seams to sew to create these lovely bibs and one of those is the top stitching that also closes over the opening where you turn the bib out the right way - so super simple and very quick!!

My Amazon ads are my affiliate links. Thank you.
Sign up for my newsletter below!
Love Quilts?
Come be social with me - click here!


Sign up for my newsletter below!

How there's so much free information on this site.
Sometimes I recommend a product(s) that I have used & loved when making my quilts etc. If you buy something through one of these links, I receive a small commission which allows me to design & make more quilts! There is no extra charge to you, and it helps keep my information/patterns free of charge. To learn more please see my affiliate disclosure document.
Recent Articles
-
Perth Quilt Tour 2019
Nov 08, 18 04:17 PM
May 19 to May 28 2019 – Time for a getaway Join the fully escorted tour and take in the sights and tastes of the Margaret River Valley, visit the Perth Craft & Quilt Show and plenty of other exciting…
-
Pattern available for the Conical Felt Tree!
Oct 13, 18 11:21 PM
The Conical Felt Tree pattern is now available. This is a fabulous Christmas tree to make for young children. They will decorate this tree over and over again! Suppliers of the thick felt & Velcro fab…
-
Conical Felt Christmas Tree
Oct 11, 18 09:00 PM
Cassie is having fun decorating her Christmas tree! The pattern will be available at the end of October 2018.