Scrappy Star Tutorial
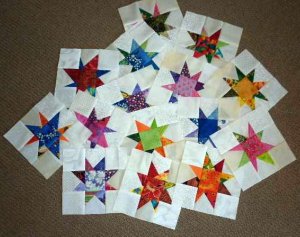
This fantastic scrappy star block I have seen on several peoples blogs. They all looked fantastic and I just couldn't wait to give them a try. I love being able to use up my wee bits of fabric!
All you need to make these stars are lots and lots of scraps. I have used my smallest pieces but you may prefer to use wee 2 1/2" squares (or similar size). A word of caution - when using my irregular shaped scraps I forgot the golden rule of using the grain of the fabric to keep everything flat so part way through I decided to use wee squares, cut along the straight of the grain - so much easier!
Here is how I made mine! and what I'm thinking of doing with them!
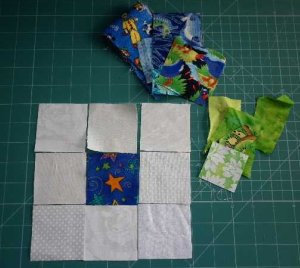
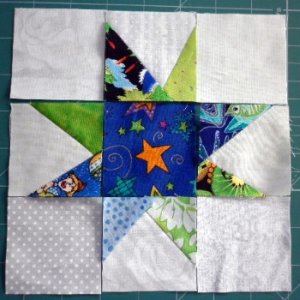
This block is based on the Nine Patch Block. I used my neutrals for the surrounding fabric and my brights for the centre and star points. Each star is comprised of 2 colorways.
Step One
Lay out your nine patch background and fabrics for the star points.
Step Two
Place your first color on top of a neutral background square (right side to right side) ensuring that when sewn and turned over it covers the corner. It's fun not having to have every piece in an exact position. I used 1/4" seam allowance on all my seams.
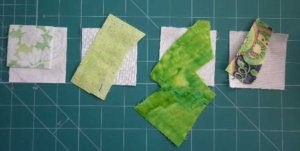
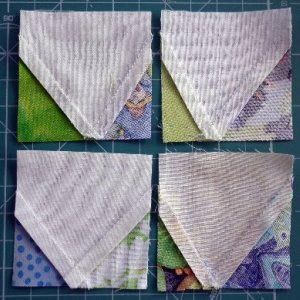
Step Three
Sew in place. This block lends itself to chain piecing and this does help to get a lot of stars made quickly.
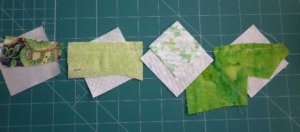
Step Four
Turn over and press. Trim away excess fabric. I also trimmed away the spare neutral fabric as well to reduce the bulk. You will see this in a further photo in step 7.
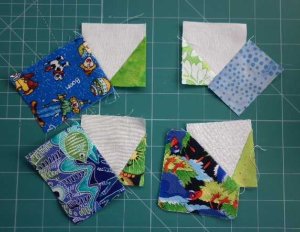
Step Five
Position your second color (star point) and sew in place.
Step Six
Turn over and press. Then trim off excess fabric as before.
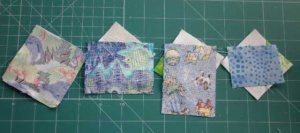
Step Seven
This is the view of the back of my star points. You can see that I have trimmed off all excess fabric and I now have wee squared blocks ready to make my scrappy star.
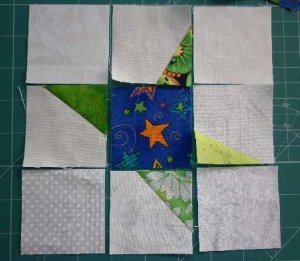
Step Eight
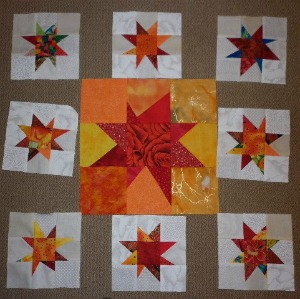
Lay out your wee blocks to create your scrappy star!
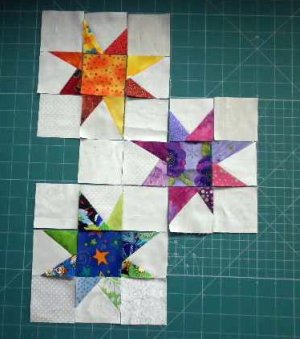
Before sewing this star together you need to think about how you are going to use it. I made up a lot of individual blocks and didn't like the effect of them placed in lines. Scrappy stars needed more thought.
I then made some more stars but played with them first before sewing them together.
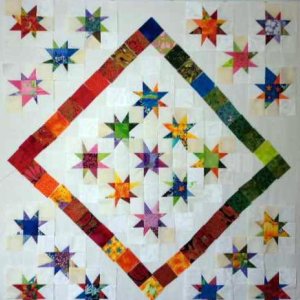
At this point I was stumped! So off to the floor or design wall! Sometimes it pays to have some help - so my daughter placed them as per below and now I'm toying with an inner border color. Whatever I choose I will need to cut out some more squares! I have tried several to date and at present it's warm colors on the left verses cold colors on the right. Not yet happy so I'm going to let it percolate.
I hate unpicking so this may perculate for a while. Some of the single stars I made initally need to be partially unpicked for placement into this quilt.
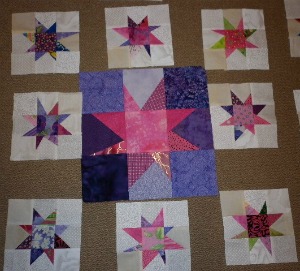
Several months have past and I have reworked my scrappy star quilt. I decided the previous design was too harsh and cold. So after much deliberation and unpicking I decided to make four large stars each in two colorways. I have added a couple of photos below. At the moment I think I will attach a white border around the large star and white sashing between the wee stars. I made the large stars 12" x 12". I'm not sure at this stage what fabric I will choose to sew the four large blocks together.
 |
 |
Sign up for my newsletter below!
Like the page? Let me know! (click the button).
Love Quilts?
Come be social with me - click here!


Sign up for my newsletter below!

How there's so much free information on this site.
Sometimes I recommend a product(s) that I have used & loved when making my quilts etc. If you buy something through one of these links, I receive a small commission which allows me to design & make more quilts! There is no extra charge to you, and it helps keep my information/patterns free of charge. To learn more please see my affiliate disclosure document.
Recent Articles
-
Perth Quilt Tour 2019
Nov 08, 18 04:17 PM
May 19 to May 28 2019 – Time for a getaway Join the fully escorted tour and take in the sights and tastes of the Margaret River Valley, visit the Perth Craft & Quilt Show and plenty of other exciting…
-
Pattern available for the Conical Felt Tree!
Oct 13, 18 11:21 PM
The Conical Felt Tree pattern is now available. This is a fabulous Christmas tree to make for young children. They will decorate this tree over and over again! Suppliers of the thick felt & Velcro fab…
-
Conical Felt Christmas Tree
Oct 11, 18 09:00 PM
Cassie is having fun decorating her Christmas tree! The pattern will be available at the end of October 2018.
New! Comments
Have your say about what you just read! Leave me a comment in the box below.