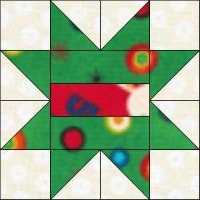
I Spy Star Block
Block of the Month 12½" x 12½" (unfinished)
 |
 |
Who doesn't like I spy quilts for young children! I designed this I spy star block using EQ7 and fabrics from my stash. The ladies will be making this block for our BOM project next month. To help keep some continuity and also encourage more blocks to be made I have cut out a lot of rectangles from my bug fabric so there will be no excuse for not having lots to made!!
Below you can down load the BOM sheet for this block and also the rotary cutting guide. Please feel free to use this in any way you want - either as I have done or alter it to suit your group. I know the sheet has our quilting group name on it and that may not suit you - sorry!
On the sheet below you will notice that I have added an idea for a finished quilt that requires a slight alteration to some of the blocks. This is very easy to do. You place a square of fabric 3½" x 3½" onto one or two of the corners and sew along the diagonal, trim off the unwanted fabric and press.


This I spy star block is very simple to construct as it is based on a four patch. To construct the block you first:
- Sew the center 3 rectangles together and press seam allowances towards the darker fabric
- Sew the half square triangles together and press seam allowance towards the darker fabric
- Lay out your pieces as per the block diagram
- Sew left and right hand side half square triangle blocks together and press
- Complete the center row
- Sew the top and bottom row blocks together
- Lastly sew the rows together and you are done!!
My advice when making this quilt block:
- Take your time when cutting your fabric as accuracy does pay off when it comes to sewing all those triangles together
- Iron your diagonal seams towards the darker fabric
- When sewing the blocks together into rows make sure to iron the seams in the same direction for each alternate row. This helps in getting the seams to nest together and the finished block looks fabulous!
- Remember to square up the finished blocks to 12 1/2" x 12 1/2" before sewing them together
I recently rediscovered Marcia Hohn's site The Quilter's Cache. Here you will find a very very large collection of blocks complete with block assembly suggestions for free and also photos of blocks and quilts that people have made using her patterns. It's a large site so I enjoy short visits for inspiration!
Sign up for my newsletter below!
Like the page? Let me know! (click the button).
Love Quilts?
Come be social with me - click here!


Sign up for my newsletter below!

How there's so much free information on this site.
Sometimes I recommend a product(s) that I have used & loved when making my quilts etc. If you buy something through one of these links, I receive a small commission which allows me to design & make more quilts! There is no extra charge to you, and it helps keep my information/patterns free of charge. To learn more please see my affiliate disclosure document.
Recent Articles
-
Perth Quilt Tour 2019
Nov 08, 18 04:17 PM
May 19 to May 28 2019 – Time for a getaway Join the fully escorted tour and take in the sights and tastes of the Margaret River Valley, visit the Perth Craft & Quilt Show and plenty of other exciting…
-
Pattern available for the Conical Felt Tree!
Oct 13, 18 11:21 PM
The Conical Felt Tree pattern is now available. This is a fabulous Christmas tree to make for young children. They will decorate this tree over and over again! Suppliers of the thick felt & Velcro fab…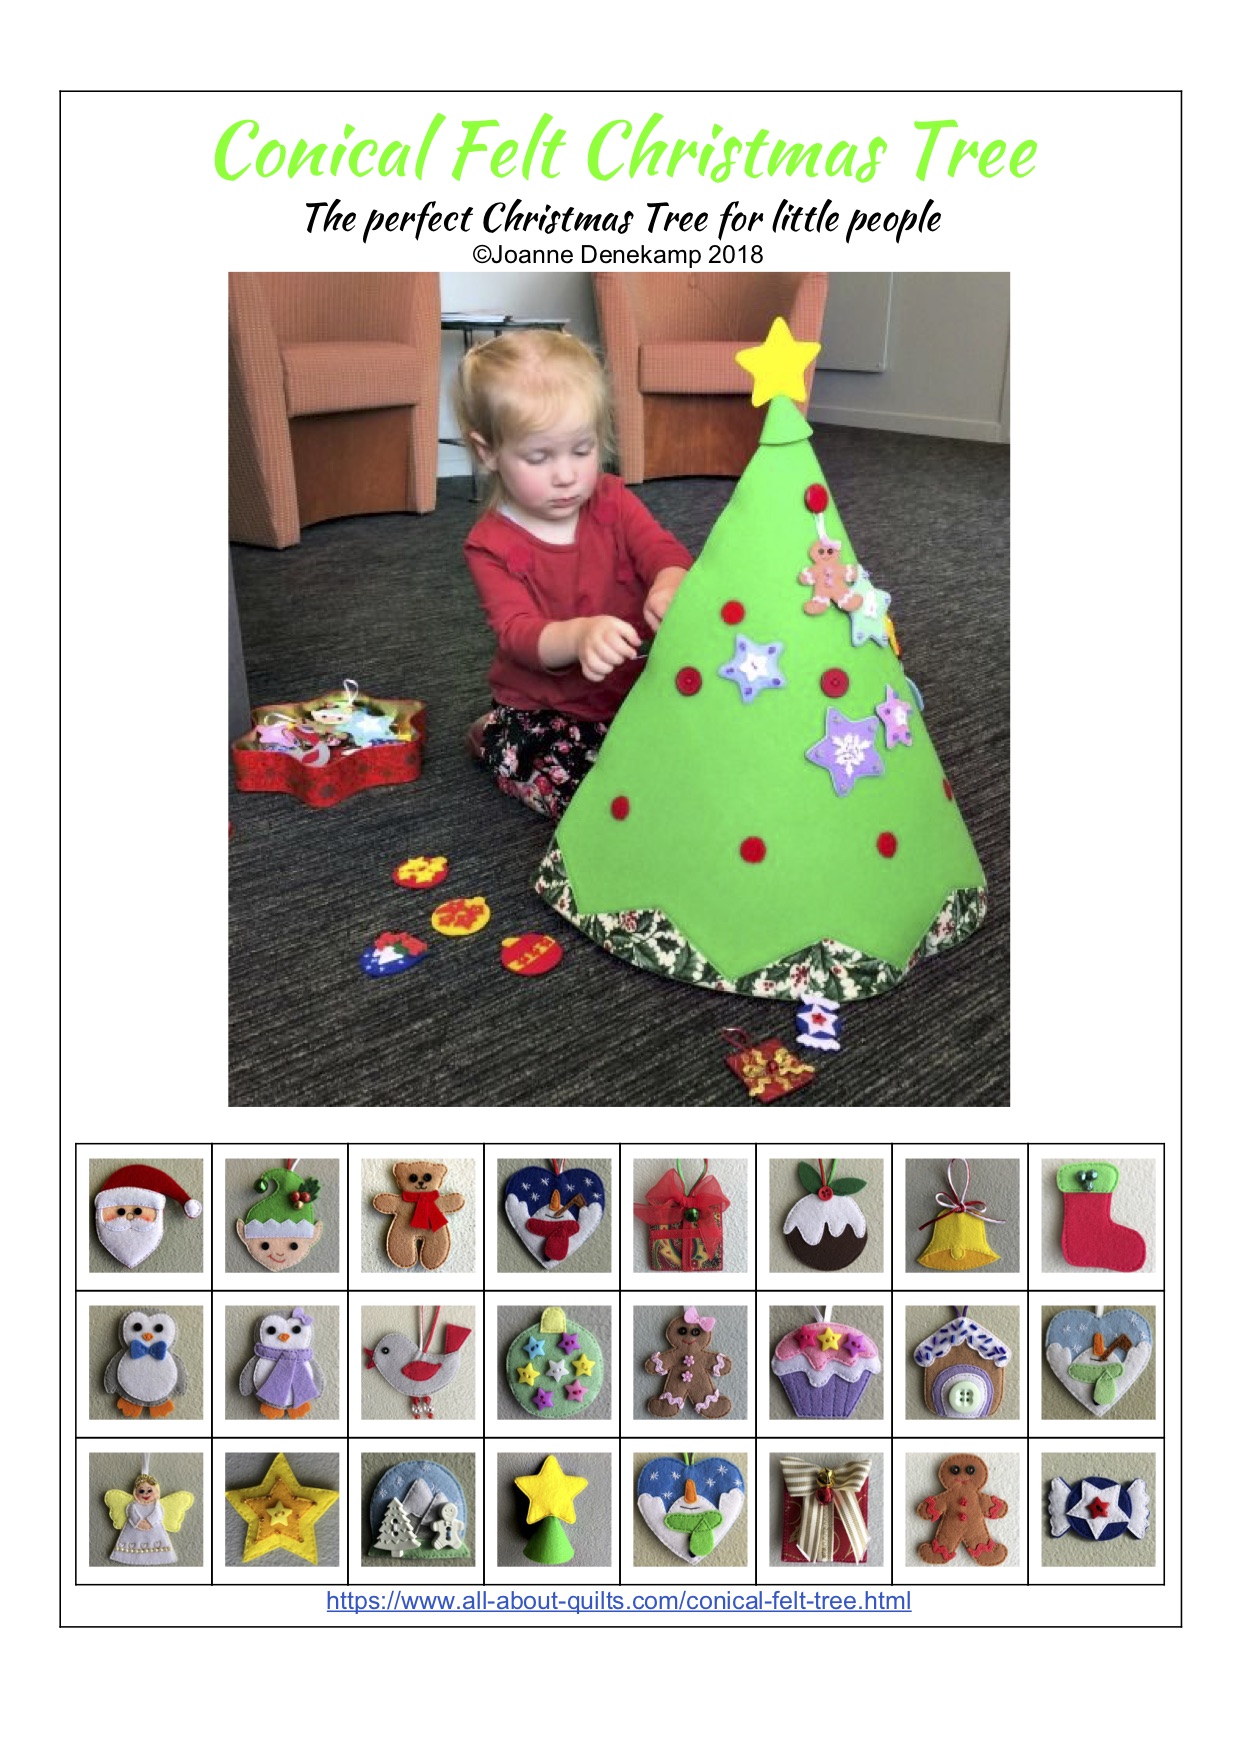
-
Conical Felt Christmas Tree
Oct 11, 18 09:00 PM
Cassie is having fun decorating her Christmas tree! The pattern will be available at the end of October 2018.
New! Comments
Have your say about what you just read! Leave me a comment in the box below.