Snuggle Bunny Toy
A free pattern for you
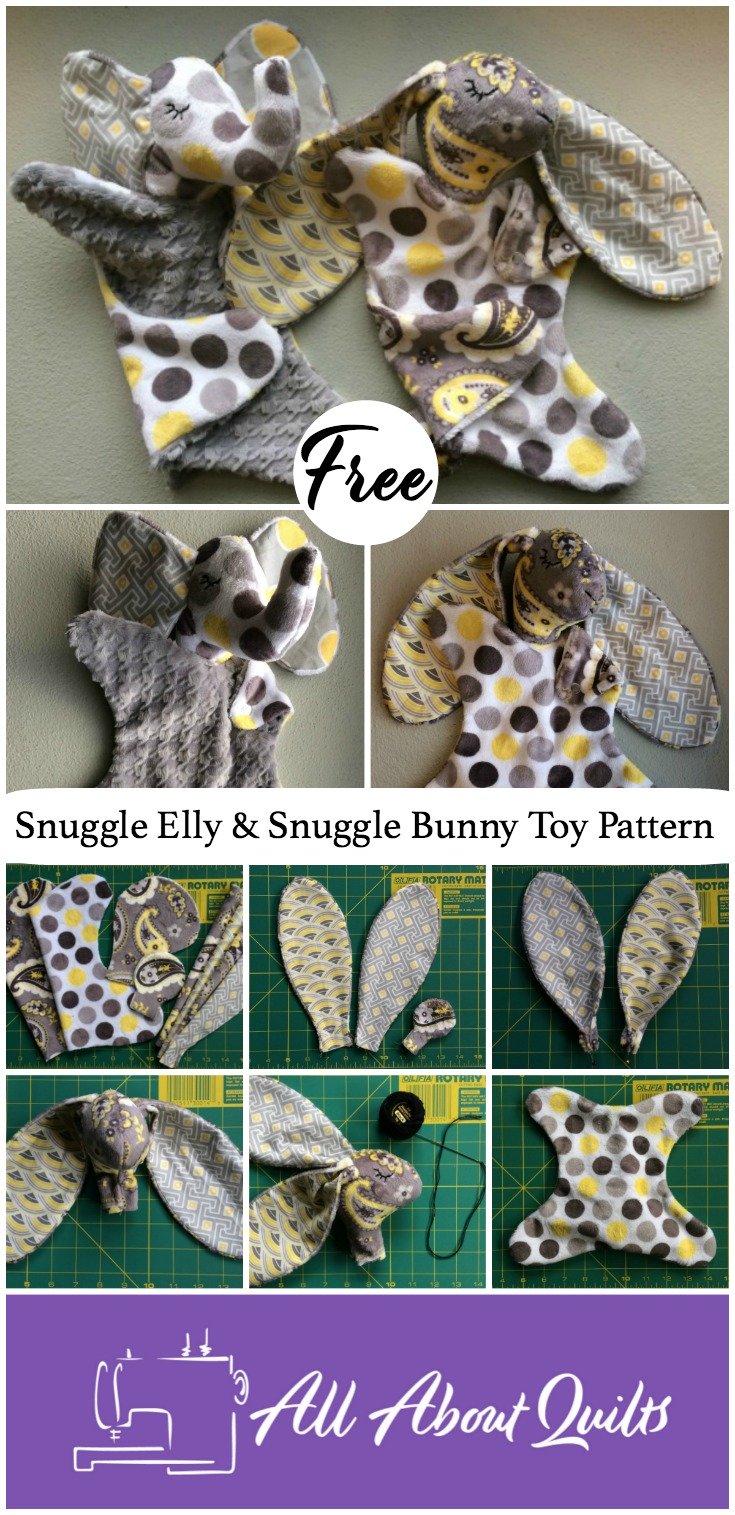

Make your own snuggle bunny toy using my free pattern. You can use any fabric you like for this bunny toy - towelling, fleece, cottons, minky or even old clothes. I made mine from minky and 100% cotton. Minky comes in a range of textures which makes it a great toy for the very young to explore.
I found a great online shop for top quality minky called The Minky Boutique. This is where I have bought quite a bit of my minky fabric and I've been delighted with the quality. Both toys above are made in minky fabric from this shop. (If the redirection gives you a warning 'not secure' then please type it into Google 'The Minky Boutique' and visit it that way).
My pattern requires small amounts of fabric so this is often able to be made out of left over fabrics... not that I'm discouraging you from a trip to the shops!

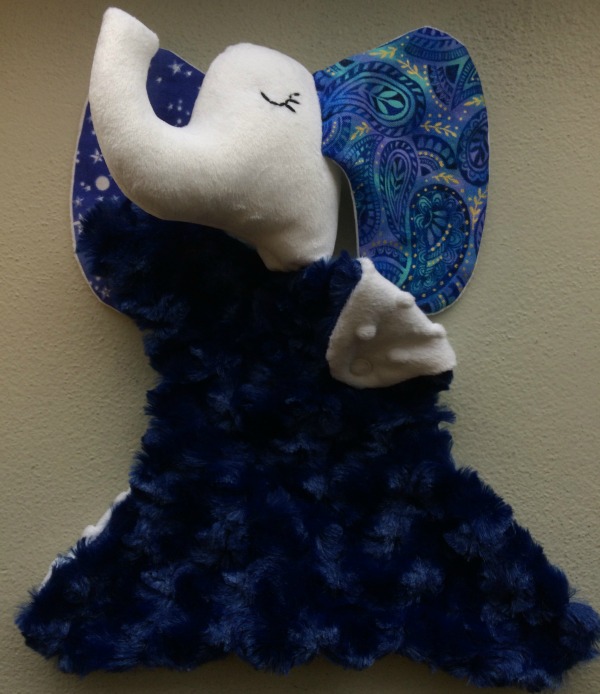
Oh and here is Snuggle Bunny's best friend Snuggle Elly and I have included Snuggle Elly in the pattern as well.

The following tutorial is for Snuggle Bunny Toy.
So lets get started!
Requirements
- 30cm of main body fabric
- 30cm of contrast body fabric
- small fabric pieces for inner ears - 2 different prints
- small amount of stuffing for head & tail
- heavy thread for eyes & mouth
- snap for hand
Cut out all your pieces as shown on each pattern piece

You will have:
From Main Fabric:
- 1 x body piece
- 2 x head pieces
- 2 x ear pieces
- 2 x tail pieces
From Main Contrast Fabric:
- 1 x body piece
From 100% Cotton Fabrics
- 2 ear pieces in different fabrics
Remember to mark the eye, ear and tail placement guides. My ear & tail placement guide lines are very, very generous so don't cut them until you are ready to insert the ear & tail pieces.
All seam allowances are 1/4-inch unless otherwise stated. Also, make sure to back stitch at the beginning and end of each seam.
NB
I like my snuggle bunny toys to have the inner ear and tummy fabric cut slightly smaller so that the main fabric rolls over the edge - personal preference!! If you also would like to do this then you need to position the pattern piece just over the fabric fold as shown below. So easy!

Sewing the Ears & Tail
Pin the ear pieces, each ear having one piece of main fabric and one piece of contrast fabric, right sides together and sew them together with a 1/4" seam, leaving the straight edge open. If you have cut your inner ear pieces smaller like I have then you will have a slight surplus of main fabric as can be seen on the left ear below - don't worry this is just as it should be.

Sew together the two tail pieces, right sides together with a 1/4" seam, leaving the straight edge open at the base of the tail for turning and light stuffing.
Clip around the curved edge of both ears and tail pieces being careful to not clip the stitches. Why clip? - this helps the seam allowance to sit better when they are turned.

Turn both pieces right side out. See how the main fabric folds over the ears edge - I love this look! Lightly stuff the tail. Press with care if you have used minky fabric.

Now fold ears as shown above and pin in place. Leaving the pins in for the next step can prove a bit problematic so if you'd prefer you can tack or machine stitch to hold them in place.
Sewing the Head
Pin the head pieces right sides together and sew them together with a 1/4" seam, leaving the bottom straight edges open.
Now we will attach the ears to the head. Measure ears width at their base. Cut a slit the same width as the ears base where indicated on the pattern.

Insert the ears up through the neck. This is a bit tricky and you'll need a bit of patience but it'll be worth it.
Pin both ears in place as shown below and stitch across both ears and head center securing the ears in place. You will need to taper the stitching at the beginning & end of the row. No 1/4" seam allowance used here!

Turn right side out and stuff the head moderately. No need to stuff the neck as most of the neck will be inserted into the body.
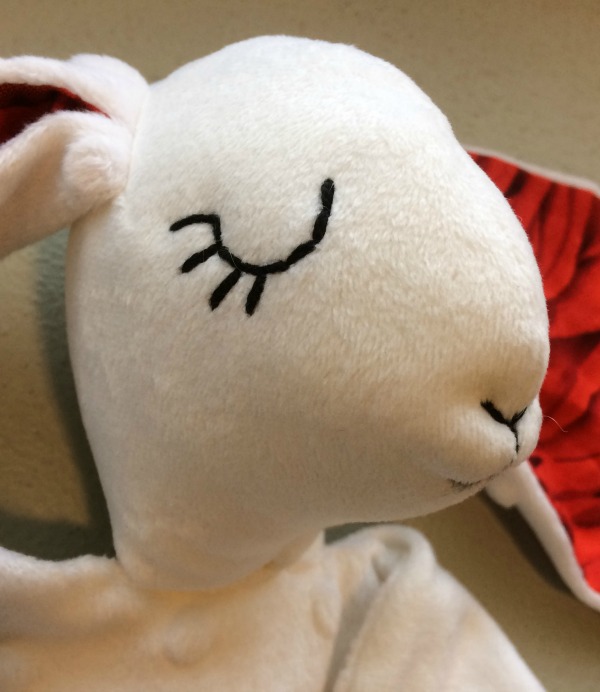
It is now time to add the eyes and mouth if you choose to.
The face of your bunny is a very personal thing and will give your bunny its own unique personality so don’t worry if it doesn’t look just like mine.
Using the black embroidery thread (or similar) create the eyes by:
- a couple of french knots in the same spot or
- stitching a simple X or
- Sleeping eyes with lashes like mine
I used a very long needle to do this and this does make it easier but it is not essential. The needle I use is a Doll needle and is shown in the photo below.
Hide your loose thread ends inside the stuffing.

Sewing the Body
First we will attach the tail to the body. Measure tail width at base. Cut a slit the same width as the tail base where indicated on the pattern and insert the tail from the right side.
Pin in place as shown below and stitch across securing the tail in place. You will need to taper the stitching at the beginning & end of the row. Again no 1/4" seam allowance used here.

Next pin the body pieces right sides together and sew them together with a 1/4" seam, leaving the neck edge open & taking care not to stitch over the tail. If you have cut your tummy body smaller like I have then you will have a slight surplus of main fabric. Don't worry this is just as it is suppose to be.

Clip the curves and then turn the body right sides out. Back & front of my bunny below.

Attaching the Head to the Body

Place the head inside the opening at the top if the body & pin in place. No need to leave a long neck showing. Sew together through all layers using a zipper foot on your machine taking care to catch all the layers.
You will notice that I added a snap closure to one of the bunny's arms - this was so that a teether ring could be attached or a clasp attached so that it can be clipped onto a pram.
Your Snuggle Bunny toy or Snuggle Elly toy are now ready to become someones best friend!

Why I made my Snuggle Bunny Toys


My wee granddaughter loves to grab hold & squeeze her mum's neck and/or face when snuggling in for a cuddle, causing pain and leaving scratches (these can just be seen in the photo above). So my daughter showed me a couple of images from a NZ facebook page and asked if I could make her one.
The photos show both the Snuggle Bunny Toy and the Snuggle Elly Toy prototypes in use.
She uses her right hand to now stroke the toy rather than skin grabbing (if the toy is there) - thank goodness.
We hope she loves them both.

And here's what happens when the older sister's see a snuggle toy... be warned!
This one is based on Dr Seuss's Horton (which is the theme of her bedroom) but in the colours of Frozen, requested by 4 year old Bella.
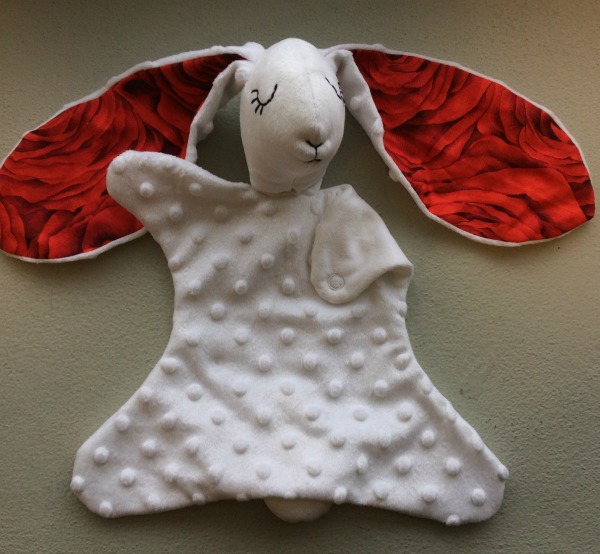
And here's the white rabbit from Alice in Wonderland for my other granddaughter.
My Amazon ads are my affiliate links. Thank you.
Sign up for my newsletter below!
Like the page? Let me know! (click the button).
Love Quilts?
Come be social with me - click here!


Sign up for my newsletter below!

How there's so much free information on this site.
Sometimes I recommend a product(s) that I have used & loved when making my quilts etc. If you buy something through one of these links, I receive a small commission which allows me to design & make more quilts! There is no extra charge to you, and it helps keep my information/patterns free of charge. To learn more please see my affiliate disclosure document.
Recent Articles
-
Perth Quilt Tour 2019
Nov 08, 18 04:17 PM
May 19 to May 28 2019 – Time for a getaway Join the fully escorted tour and take in the sights and tastes of the Margaret River Valley, visit the Perth Craft & Quilt Show and plenty of other exciting…
-
Pattern available for the Conical Felt Tree!
Oct 13, 18 11:21 PM
The Conical Felt Tree pattern is now available. This is a fabulous Christmas tree to make for young children. They will decorate this tree over and over again! Suppliers of the thick felt & Velcro fab…
-
Conical Felt Christmas Tree
Oct 11, 18 09:00 PM
Cassie is having fun decorating her Christmas tree! The pattern will be available at the end of October 2018.
New! Comments
Have your say about what you just read! Leave me a comment in the box below.